Sage Green Granny Cardigan
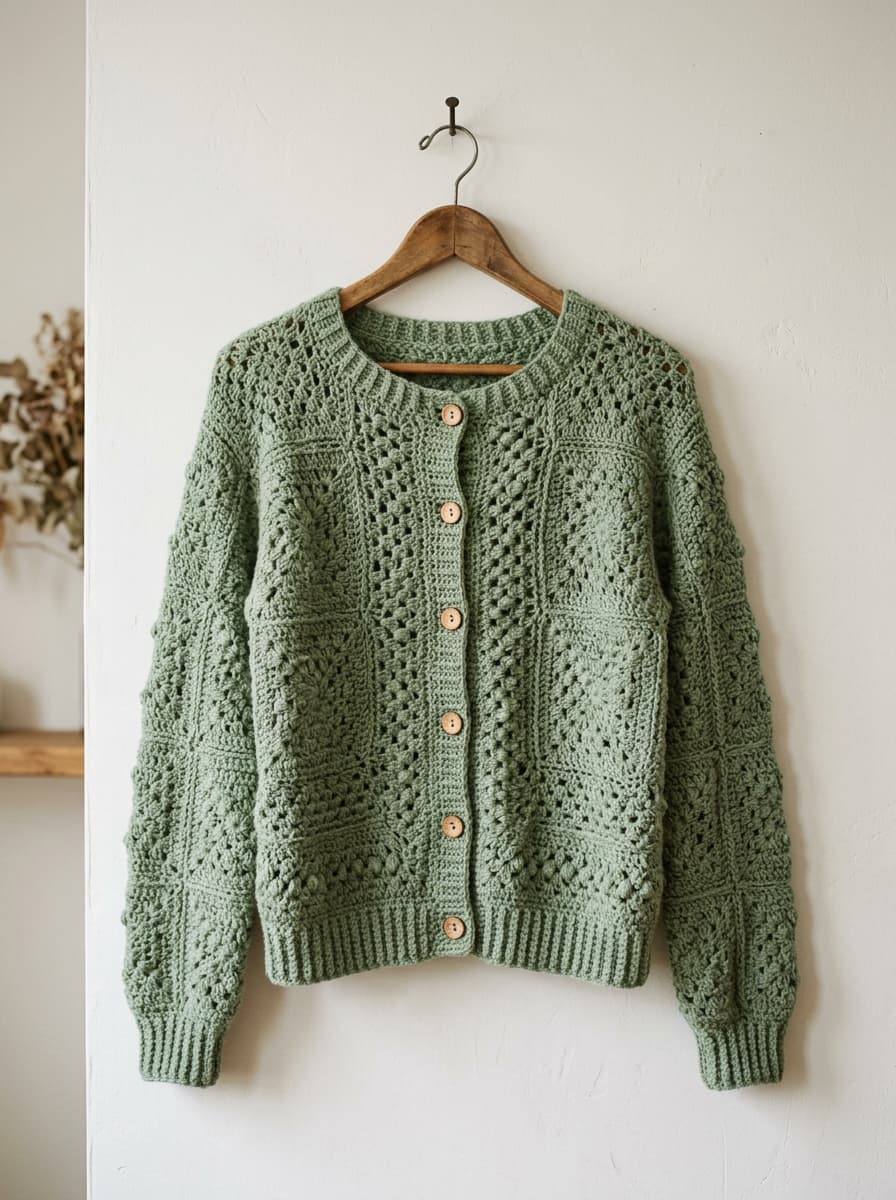
A relaxed, boho-chic cardigan worked in granny square motifs and solid panels. Great for layering in every season. Written in four sizes with clear shaping instructions.
Pattern Quick Specs
Read full instructions below. Enjoy free unlimited access to this crochet pattern.
Materials & Tools
- ✓900 (1100, 1300, 1500)g DK yarn in Sage Green
- ✓4.0mm (G) crochet hook
- ✓5 × 18mm wooden buttons
- ✓Stitch markers
- ✓Yarn needle
- ✓Scissors
Crochet Abbreviations & Terms (10)
About This Pattern
This oversized, relaxed cardigan is constructed from individual granny squares stitched together to form the body and sleeves, with solid sc panels at the neckline and button bands. The construction works from the back out to the sides, making sizing intuitive and easy to adjust.
Sizes: S (M, L, XL)
All instructions are written for size S, with larger sizes in parentheses.
Gauge
18 sc × 20 rows = 4 inches in sc stitch
Each granny square = 4 × 4 inches
Achieving gauge is critical for wearable items. Adjust hook size as needed.
Construction Overview
The cardigan is made in three parts:
- Back panel — a rectangle of granny squares (5 × 7 squares for size S)
- Two front panels — each 2.5 × 7 squares wide
- Sleeves — worked in the round from armhole down
Making the Granny Squares (Make 63 for size S)
Round 1
- Magic ring: ch 3, work 11 dc into ring, join with sl st. (12 dc)
Round 2
- Ch 3, dc in same st, *ch 1, skip 1, 2 dc in next; rep from * around. Ch 1, join.
Round 3
- Sl st to ch-1 sp. Ch 3, (2 dc, ch 2, 3 dc) in same sp — corner.
- *Ch 1, 3 dc in next ch-1 sp, ch 1, corner in corner sp; rep from * around.
- Join with sl st. Fasten off.
Back Panel
Join squares in a 5 × 7 grid using the flat sl st join method (RS facing together). Leave the top two square-widths unjoined on each side edge — these will become the armhole openings.
Front Panels
Make two panels of 2 × 7 squares each. Join squares in columns.
Joining Body
With RS facing, sl st front panels to back panel at shoulder seams. Leave armhole openings.
Sleeves (Make 2)
Join yarn at armhole. Work in joined rounds of dc, decreasing 1 st each side every 5th round until sleeve measures 16 (17, 17.5, 18) inches. Work 6 rows ribbing: ch 2, *dc in back loop, rep from *, turn. Fasten off.
Button Band
With RS facing, sc evenly along front opening. Work 3 rows sc. On Row 2, make 5 evenly spaced buttonholes: sc 3, ch 2, skip 2; rep. Sew buttons opposite buttonholes.
Finishing
Weave in all ends. Wet block the cardigan to measurements for best drape. Sew on buttons.
Community Comments & Notes
Made this pattern or have a question? Share your work, modifications, or questions with the community!
More Inspiration